Category: Dinner

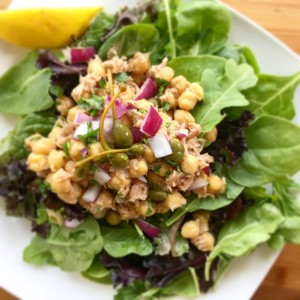
Mediterranean Tuna Salad!

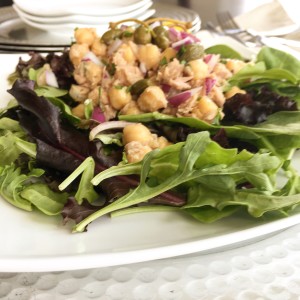
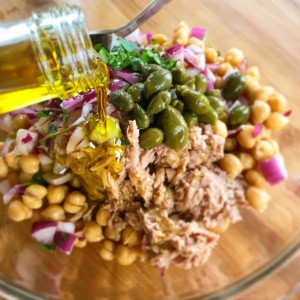
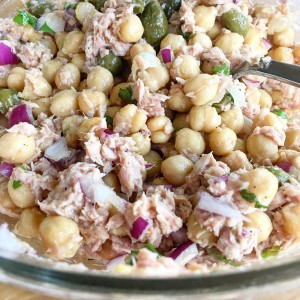
This summer salad is packed with proteins, good fats, and so super healthy! But that’s not the point. It is delicious. My mayo haters will be happy because this Mediterranean tuna salad is made with an olive oil coating instead of mayo!

image

I love adding garbanzo beans because it bulks up the salad, fills you up and adds protein at the same time.

image

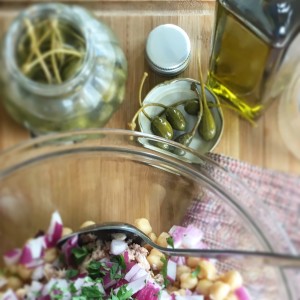
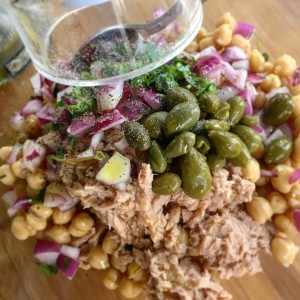
Caperberries are brand new to us. Chef David and I used them on a recent Between The Eats Tapas and Pinchos episode, and my family fell in love with them!

image
The fruit, berries of the caper, are like olives but smoother. I can’t wait to try them in a martini!!
Here is the recipe…

image

Mediterranean Tuna Salad
Ingredients:
2 cans, chunk light tuna in water, drained.
2 cans garbanzo beans, chickpeas
1/2 small red onion, chopped
2- 3 tbsp. caperberries
2-3 tbsp. sliced olives
1/4 cup olive oil
lemon juice, 2 lemons
salt/peper

parsley, chopped for garnish
Baby spring mix, plating

Directions:
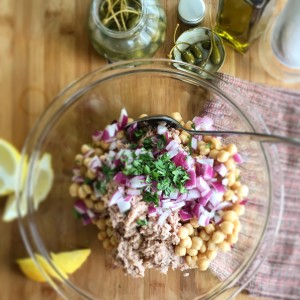
Mix all ingredients in a mixing bowl, except for parsley and lettuce.
Chill 2 hours.
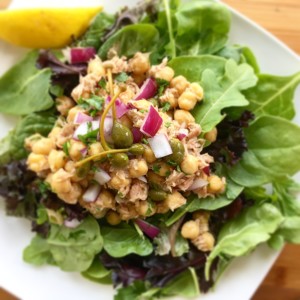
Plate tuna salad on a bed of baby spring mix.
Top with extra caper berries, and chopped parsley.

image

image

image

image

Enjoy!
Ciao!

Sicilian Garlic Oregano Grilled Potatoes!

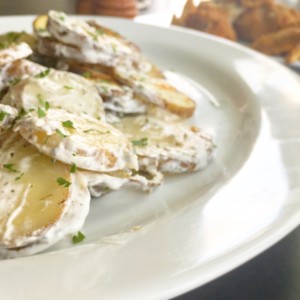
Quick and easy summer recipes continue with grilled sliced potato recipe. Bursting with flavor, these potatoes have an herb salty garlicky bite with the creaminess of the sour cream finish! These potatoes are fabulous with summer seafood!

image

Sometimes I grate Parmesan cheese over the grilled slices and forget the sour cream!

image

A tip that I recently learned from my co-host Chef David on Between The Eats is that you want to place the potato slices in cold water and bring the pot up to a boil. By doing this the inside and outside of the potato have a chance to get to the same temp for even cooking. This eliminates the outisde of the rounds smushing. Has this ever happened to you? It’s the worst! Your recipe will become starchy from broken potato pieces falling off.

image

Here is the recipe…

Ingredients:
2 large potatoes, sliced 1/4 inch slices
2 tbsp. Olive oil
1 tsp. Onion powder
1-1/2 tbsp. Dry oregano
Salt/pepper to taste
3 cloves roasted garlic, minced
3-4 tbsp. Sour cream
Parsley or chives

Directions:
Boil sliced potatoes from cold water until a knife test shows just softened, but still firm potatoes.

Drain and cool 5 minutes.

Meanwhile heat the grill to a medium flame.

Add potato slices, olive oil, oregano, onion powder, garlic, salt and pepper to a Gallon ziploc bag.

Gently coat potatoes being careful not to smush.

Place a piece of foil on the grill grate, and line up the potatoes being careful not to overlap.

Grill 4-7 minutes until bottom is golden brown and flip. Grill another 3-5 minutes until done.

Remove from grill, toss with sour cream, sprinkle with chives or parsley and serve.

image

image

Enjoy!
Ciao!

Garlic Parm Wings!

I get in the mood for wings and my go-to flavor is garlic Parmesan. The one food item that I do not like- there really are not that many- is buffalo sauce. In general any kind of saucy wing turns me off. My favorite wings are crisp, with dry seasoning or a glaze! Covered in Parmesan cheese is always a bonus! Ha!

Here is my recipe…

image

Roasted Garlic Parmesan Wings

1 lb. wings, I cut them at the joints and used the wingette.
2 tbsp. Garlic olive oil
4 cloves Roasted garlic, finely chopped
1 tbsp. Garlic salt
Salt/pepper to taste
1/2 cup+ fresh grated Parmesan cheese
Your favorite dipping sauce, I used Romesco sauce

Directions:
Preheat oven 500 degrees.

In a large mixing bowl toss wings with garlic oil, garlic, garlic salt, salt and pepper until well coated.

Place on an aluminum foil covered pan.

Roast 8-10 minutes until browning, flip another 8 -10 until crispy.

Remove and roll in Parmesan.

image

image

Enjoy!
Ciao!

Kafta Kabobs!

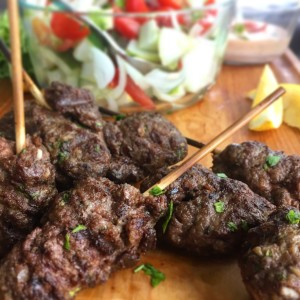
Kafta, Kofta, Kefta…every translation spells it differently! Let’s call it meat on a stick. Ok, really flavorful meat on a stick.

image

With Lebanese exotic flavors of cumin, cinnamon, and of course the garlic, Kafta has a deep layering and tastes like a full meal. Often served cold for lunch, or hot for lunch or dinner, it is a fun opportunity to try something different that is really quick and easy to make.

My kids are fans because it is on a stick I think. They first started eating “things kids aren’t supposed to like” when skewered. Try it, seriously!

image

A few tips, I used an egg. (Gasp!) Kafta is traditionally stuck together by using soaked white bread that’s rung out and put in the food processor. Yeah, So are traditional meatballs, but sometimes you don’t want to clean the thing, right? Feel free!

Soak the sticks! I forgot and a few of mine burned!!

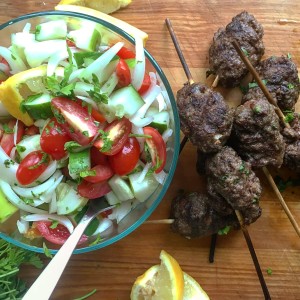
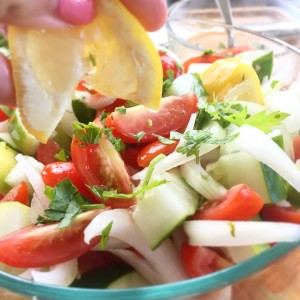
The cucumber salad is amazing and accompanied meat dishes quite often on my table in the summertime.

image

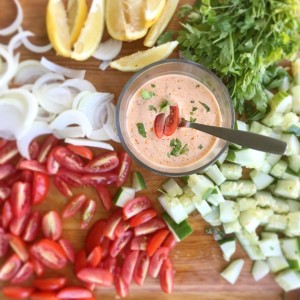
And guys, the sauce…simple and delicious! It’s more powerful than a smoothe tahini with the punch of Romesco. I used a delicious jarred Romesco, but you can get crazy and make your own!

image

Here are the recipes…

Kafta Kabobs

Ingredients:
1 lb. ground beef
3 garlic cloves, finely chopped
1 small onion, finely chopped
1/4 cup parsley, finely chopped
1 egg
1 tsp. Allspice
1 tsp. Cumin
1/2 tsp. Paprika
1/2 tsp. Cinnamon
Salt/pepper to taste
Skewers

Directions:
Soak skewers in water for at least one hour until ready to mold the

Heat grill to 300 degrees.

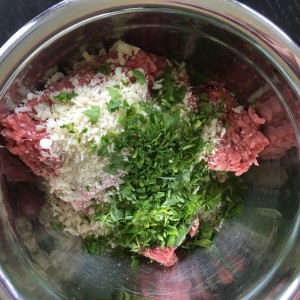
With hands, mix beef, garlic, onion, egg, and all of the spices, salt and pepper.

image

image

Mold 1/6 of the mixture onto one end of each skewer trying to keep mold to 1 inch thickness.

Grill approximately 4 minutes each side until cooked to desired fineness.

image
Cucumber Salad

Ingredients:
1 cucumber chopped
1 pint grape tomatoes, halved
1 small red onion or Vidalia onion, sliced
Handful parsley, chopped
1 lemon , squeezed
3 tbsp. Garlic oil
Salt/pepper to taste

Directions:
In a large moxing bowl, toss to coat.

Greek Yogurt Romesco Sauce
1/4 cup plain Greek Yogurt mix with
1/4 cup Romesco
Chopped Parsley flakes and sliced tomato garnish

image

image

Enjoy!
Ciao!

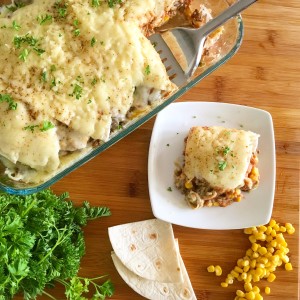
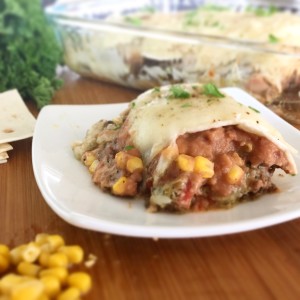
The Best Ever Mexican Lasagna!

Truth. I have tried many different “Mexican Lasagnas” throughout the years. Mostly using leftovers. They ended up being a delicious undressed taco with layers, but honestly never blew my socks off!
image

image

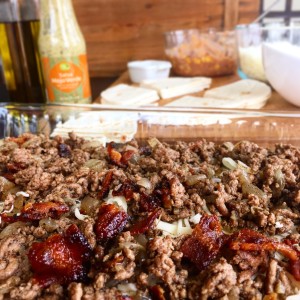
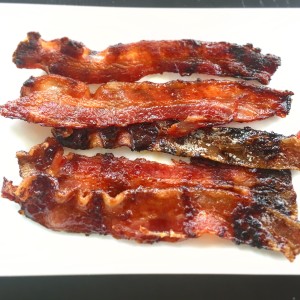
So this time I had an idea. Why not add some yummy Brown Sugar Sriracha Glazed Bacon and see what happens. What happened was like the best thing ever! So instead of a very good cumin, chili powder seasoned garlic onion ground beef layer-kind of boring- we have crunchy bites of sweet and spicy glazed bacon throughout the meat later! Yikes! So good!
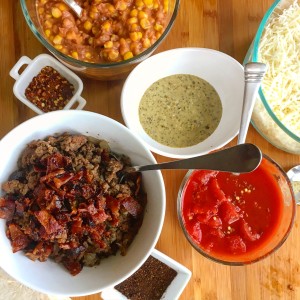
image

image

Like most lasagnas, the leftovers the next night were even better!

Here is the recipe…
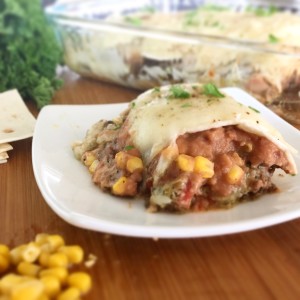
image

Mexican Lasagna
Makes one 9X13 lasagna

Ingredients:
2 tbsp. olive oil for meat and 2 tbsp. for casserole dish
1 lb. ground beef
1/2 lb. Brown Sugar Sriracha Glazed Bacon (see recipe below)
3 cloves garlic, chopped
1 small onion, chopped
1 tbsp. cumin
2 tbsp. chili powder
red pepper flakes- for added heat
salt/pepper to taste
1 15 oz. can refried beans
1 cup corn kernels, frozen and steamed, canned, or fresh cut off the cob
1 cup Salsa Mojo Verde /your favorite taco sauce
1 14 oz. can stewed tomatoes
10 flour tortillas
2 cups shredded chihuahua cheese
1 cup shredded mozzarella cheese
cilantro, garnish

For the Brown Sugar Sriracha Glazed Bacon
Ingredients:
1/2 lb. thick sliced bacon
1/2 cup dark brown sugar
2 tbsp. sriracha sauce

Directions:
Heat olive oil in a medium pan.

Toss onions and garlic with oil and cook for 3 minutes.

Add ground beef and cook until no longer pink, drain any excess fat.

Place meat in a mixing bowl.
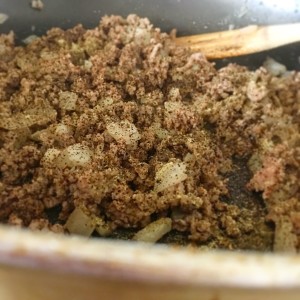
image

Meanwhile, to cook the Brown Sugar Sriracha Glazed Bacon…
Preheat oven 350 degrees.

Place bacon strips in a single layer on an aluminum foil covered cookie sheet.

Sprinkle dark brown sugar.

In a top to bottom motion, squeeze a small stream of Sriracha sauce in zig zags.

Bake 13-18 mins. until glazed and crispy. (Remember, the sugars on the bacon will “crisp up” as they cool. Don’t think it will be crunchy when you remove it from the oven. I know it’s hard to wait, but don’t burn your mouth it will be very hot!!)
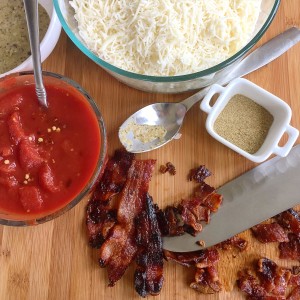
image

image

image

When cool, chop bacon into 1/4 inch pieces and mix into ground beef bowl.

Combine refried beans and corn in a separate bowl.

Combine stewed tomatoes, salt/pepper, and red pepper flakes in a bowl.

Combine cheese in a bowl.

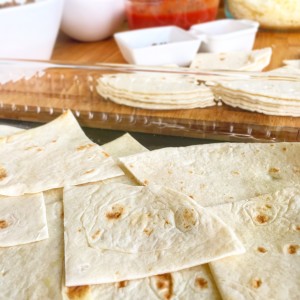
Cut tortilla shells, 2 cuts into triangles.
image


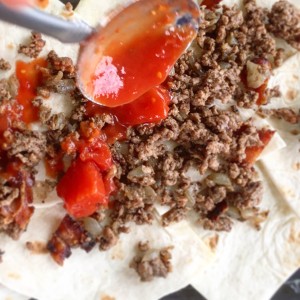
Layer lasgna-starting by coating casserole dish with olive oil, then covering by overlapping tortillas until covered.

Next, add a cheese layer, meat, tomatoes, beans and corn, salsa mojo verde or taco sauce, followed by another layer of tortilla shells.
image

End with tortillas and cheese on top.

Bake 15-25 minutes until cheese is melted and bubbly.

Sprinkle with chopped cilantro.

Enjoy!
Ciao!
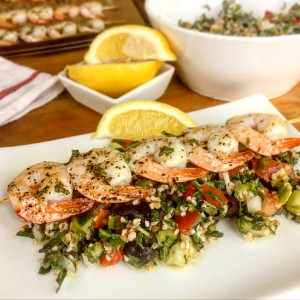
Lemon Herb Garlic Shrimp!

Everytime I prepare this shrimp dish I have people begging me for the recipe and I feel so guilty because it is so easy!

image

The lemon herb garlic shrimp skewers are perfect for a summer night when served with a cold salad, or don’t skewer the shrimp and toss them with your favorite long pasta like angel hair.

image

The technique in the recipe is the fastest – coating the shrimp with olive oil, rolling in herbs, grilling shrimp, and squeezing lemon. If there is time, the herbs can be infused in the garlic before covering the shrimp. This creates a stronger herb flavor. Either are delicious, it just depends how much time you have!

image

Lemon Herb Garlic Shrimp!

Ingredients:
1 lb. medium shrimp, cleaned and deveined
1 lemon, sliced into wedges
3 cloves garlic, finely chopped
2 thyme springs, leaves removed and finely chopped
1 tbsp. Basil, finely chopped
1 tbsp. Rosemary, finely chopped
(Cayenne pepper optional to add heat)
Salt/Pepper to taste
Wood skewers

image

image

Directions:
In a small bowl mix herbs and garlic and cover a plate.
Skewer shrimp.
Drizzle with olive oil and either brush or use clean fingers to coat.
Dip into herbs on a plate.
Set skewers on a parchment covered cookie sheet or prepare to grill.
Grill a few minutes per side until shrimp turn pink.
Broil in oven until shrimp turn pink, turning once.
Squeeze half of a lemon over cooked skewers and serve!

image

image

Enjoy!
Ciao!

Whiskey Brown Sugar Pulled Chicken Sliders!


Summer food is the best! Grilling anything definitely feels like summer. Dishes paired with cold salads make refreshing dinners on the deck! The issue ends up being prep time. I end up making fast meals because we are swimming or playing outside too long.

For the whiskey brown sugar chicken, I used the slow cooker. A home chef’s (busy mom’s) secret weapon for these sorts of dishes, the slow cooker is perfect for fall-off-the-bone meats with infused flavors, not to mention I feel safe leaving the house while it is cooking away!

image

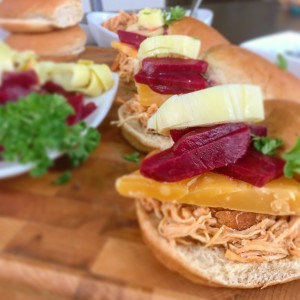
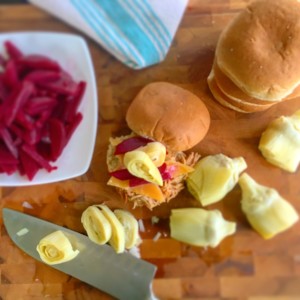
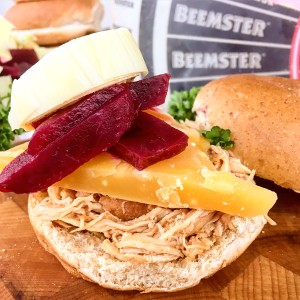
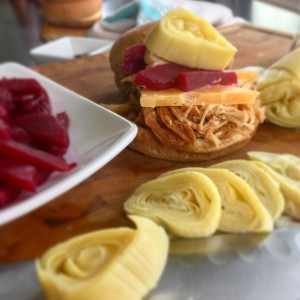
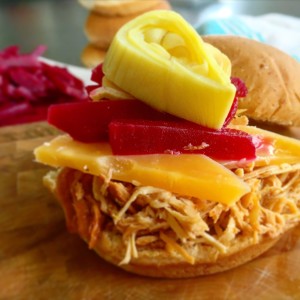
You think I am the Parmesan Princess? Well, I am the sweet and savory queen! Seriously, I cannot get enough- so it is no surprise that every ingredient is perfectly paired with its counterpart. The whiskey is paired with the sweet brown sugar. The alcohol cooks off and you are left with the hint of almost a smoky flavor. Garlic and sweet tomato paste; worcestershire sauce and spicy dijon mustard, etc. Topped with sliced sweet beets, artichoke hearts and a slice of savory aged gouda cheese. The cheese’s flavors of toasted caramel and hints of salt totally make these sliders!

image


image

Whiskey Brown Sugar Pulled Chicken Sliders
Ingredients:
3/4 cup whiskey
1 tbsp. tomato paste
2 cloves garlic, finely chopped
1 tbsp. worcestershire sauce
1 tbsp. spicy dijon mustard
1/4 cup brown sugar
2 lbs. bone-in, skinless chicken thighs
1/2 lb. Beemster Classic Aged Gouda Cheese
8 oz. artichoke hearts
8 oz. sliced beets
slider buns


image

Directions:
Pour whiskey into slow cooker.
Whisk in tomato paste, garlic, worcestershire, dijon mustard, and brown sugar until well mixed and sugar is semi-dissolved.
Add chicken to slow cooker. Chicken should not be completely submerged in liquid but wading in it.
Cook on high 6-8 hours, until chicken is cooked through and falls off the bone.
Remove thighs from slow cooker, let cool for 15-20 minutes, and shred.
Add shredded chicken back into liquid and stir well.
Slice artichoke hearts, and beets.
Scoop chicken onto a bun, add one layer of gouda cheese, and top with artichokes and beets.

image
Enjoy!
Ciao!

Sausage Gnocchi With Arugula!

Potato pillows that melt in your mouth, homemade Italian deliciousness…yep, gnocchi.  Instead of a traditional tomato sauce, I love to try new flavor combinations with gnocchi because they are a blank slate!  There are plenty of delicious fresh gnocchi, or frozen fresh options if you don’t make your own. I like to freeze my gnocchi, ravioli, and cavatelli, for a rainy day.  It is my opinion that these types of homemade pasta cook better from frozen.  This meal took under 20 minutes!  Win!
image
I received the most perfect pork sausage from the meat CSA at Big Horn Ranch and tossed it with the gnocchi, spicy oregano, red pepper flakes, and the crunch bite of arugula. Dressed with olive oil, a little goes a long way, coating each bite.  The sausage had very little fat, but sorry fat haters, fat is flavor. A reasonable amount is fine! The kids loooooved this recipe and had seconds and thirds.  I happened to have arugula handy, feel free to sub kale or spinach!


image
Sausage Gnocchi With Arugula

Ingredients:
1 lb. pork sausage, Italian sausage out of casing
1 lb. potato gnocchi, homemade or frozen
2 tbsp. garlic olive oil
4 cloves garlic, finely chopped
salt/pepper to taste
2 tbsp. crushed red pepper
1 tbsp. oregano
fresh gated parmesan cheese
Directions:
Cook sausage and garlic in a large pan while chopping and crumbling with a spoon, until browned.
Drain fat. (I was lucky and had no more than 1/2 tsp. of fat so I left it in for flavor.
Meanwhile, boil a pot of water add salt and cook gnocchi until they float.
Drain, save 2 tbsp. pasta water.
Add olive oil, sausage, and arugula to the large pan and toss to coat.
Salt/pepper to taste.
Sprinkle with oregano and crushed red pepper.
Top with fresh grated parmesan cheese.
image
image
image
Enjoy!
Ciao!

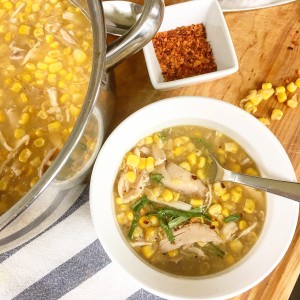
Corn & Chicken Chowder!

Most of the time my menus are planned around the weather. Chilly, rainy Spring days call for a warm and comforting dinner.

image

The days activities determine the intricacy and time commitment of the prep. There is nothing wrong with taking a few shortcuts, like buying a rotisserie chicken, for example. Hey, we are cooking at home, the number one step towards a healthier lifestyle. It is possible to cook delicious meals for the family. It is impossible to add time to our day.

image

Sweet corn has just started popping up in my local grocery stores- really early I know, but I have ben totally in the mood, especially after the 78 degree summer teaser days we have had recently. Many of my favorite dishes require fresh frozen or sweet corn cut off the cob. I am a huge salty sweet fan, so anytime corn is roasted with garlic, butter, and salty spices, I cannot get enough. My latest find is a dry sriracha seasoning. I’ve been sprinkling it on everything!

image

A corn chowder is a perfect example of this mix of flavors. Comforting, with just enough kick to be different, this recipe is a family favorite and my kid’s eat seconds!
Here is the recipe…

image

Corn & Chicken Chowder
Ingredients:
2 tbsp. butter
1 small onion, chopped
3 cloves garlic, finely chopped
2 tbsp. flour
1-1/2 lbs. chicken breast, roasted (or rotisserie chicken breast shredded)
6 cups chicken stock
1 cup heavy cream
2 – 10 oz. bag frozen corn or 6 ears of corn cut off the cob
1 14 oz. can cream style corn
salt/pepper to taste
chopped green onions /parsley for garnish
Optional- 3 tbsp. sriracha, dried sriracha, cayenne pepper to taste

Directions:

Melt butter in a soup pot.
Add onions and cook until softened.
Add garlic and cook for another 30 seconds.
Stir in flour until thickens.
Whisk in chicken stock bring to a boil and simmer 15-20 minutes.
Add chicken and corn and cook low to medium heat 10 minutes.
Ladle into bowls and top with garnish.

image

image
Enjoy!
Ciao!

Roasted Corn and Black Beans!

Happy Cinco de Mayo! For some of us, Mexican night is a weekly occurrence, taco Tuesday for example, but for others it is rare.
image

In my house, Mexican is an important weekday supper staple. An easy dinner filled with fresh vegetables, and the kids ask for seconds? Everybody wins!
image

I change up my menu based on taco type- beef, chicken, pork- or I add some different side dishes. The dishes include some combination of beans and rice, roasted corn, and homemade chunky salsas. Roasting the corn creates a depth of flavor. I especially love corn on the cob done this way- roasted and seasoned with butter, chili powder, cayenne pepper, topped with sour cream and sprinkled with garlic and cilantro. It is absolutely delicious!

image

Here is the recipe for my roasted corn and black beans dish…

image

Roasted Corn and Black Beans
Ingredients:
2 cups corn, sliced off the cob or frozen.
2 tbsp. Olive oil
3 cloves of garlic, finely chopped
1/2 small onion, finely chopped
1 cup black beans, cleaned and soaked
1 tsp. Chili powder
1/2 tsp. Cumin
1/2 tsp. Cayenne pepper
1 tbsp. Chopped cilantro
Salt/pepper to taste

Ingredients:
Heat olive oil in a medium pan.
Add corn, garlic and onions.
Cook until corn is browned and garlic and onions are softened.
Add beans, salt/pepper, chili powder, cumin, and cayenne pepper. Mix well.
Remove from heat and toss with cilantro.
Serve warm or cold.

image

Enjoy!
Ciao!