Category: Recipes

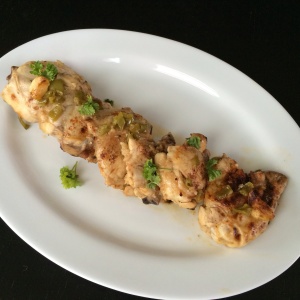
Honey Garlic Jalapeño Chicken!

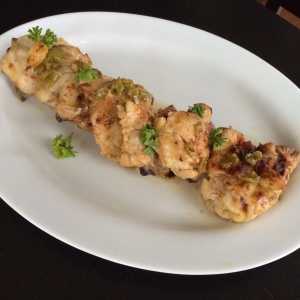
Fall-off-the-bone, juicy, flavorful chicken thighs are the absolute best! Since most of the time we don’t meal plan one day ahead, a long marination process can seem impossible. By using a robust marinade, you can easily create a depth of flavor without the 8 hour marination process. By robust, of course I mean garlic, a hint of jalapeño, and honey for sweetness. A quick coating is all it takes!

image

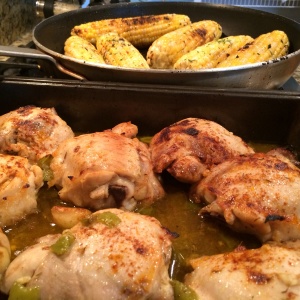
I suggest grilling the thighs. If you live in Pittsburgh it’s impossible because it rains everyday! You can brown them in a pan like I did. The great thing is the thighs get completely smothered in gooey deliciousness and finished off in the oven, so either works. The marinade actually reduces to a thick sticky coating in the pan, totally ideal for chicken thighs.

image

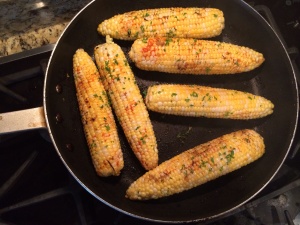
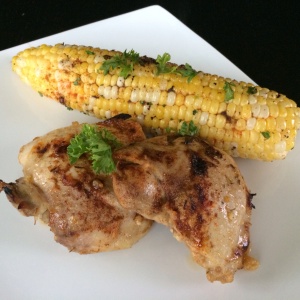
I utilized the left over pan goo to pan sear the corn on the cob…this was genius.

image

Robust garlic and honey flavors with a hint of jalapeño is perfection on corn!!!

image

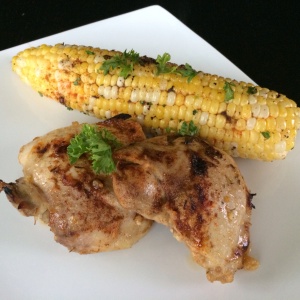
All I added was a coating of butter, a shake of paprika, and some finely chopped parsley for a fancy finish.

image

Garlic Honey Jalapeño Chicken
(makes 6-8 chicken thighs)

Ingredients:
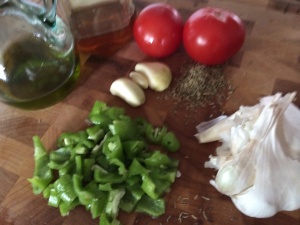
1/3 cup honey
6 cloves of garlic, finely chopped
1 large jalapeño pepper, finely chopped
3 tbsp. olive oil- 2 tbsp. marinade/ 1 tbsp. for pan
2 tbsp. balsamic vinegar
Handful of chopped parsley or cilantro
salt/pepper
6-8 chicken thighs, skin on or off and rinsed

image

Directions:
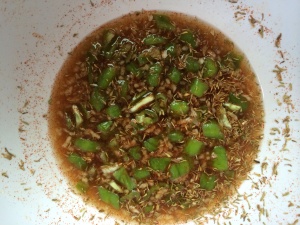
Mix all ingredient together in a mixing bowl.

image

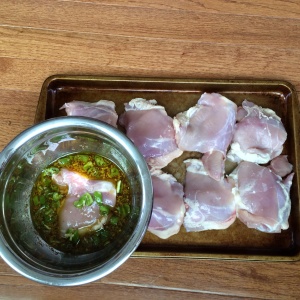
Coat chicken thighs in a ziploc bag or 9X13 pan to marinate.

image

Heat oven 350 degrees.
(Overnight or all day is best …if you have time! This marinade is strong so it is not absolutely necessary.)

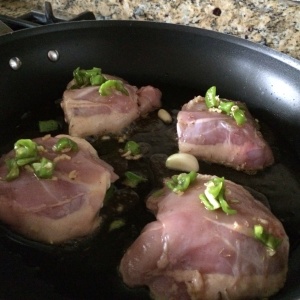
Heat 1 tbsp. olive oil in a large pan.

Remove thighs from marinade and add to the pan. Keep excess marinade!

image

Brown thighs on each side 3-4 minutes per side.

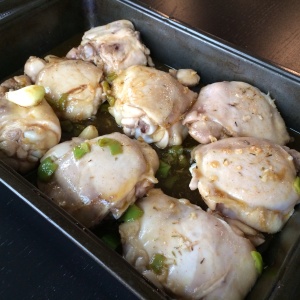
Remove thighs from pan and add to a 9X13 baking dish.

image

Pour excess marinade over thighs.

Cover with foil and bake 35-45 minutes, make sure juices run clear. Chicken will be “fall off the bone” yum!

Especially if skin-on, crisp the thighs under the broiler for 5-7 minutes until desired crispness.

Let stand 5-10 minutes and serve!

image

image

I serve these delicious thighs with Pan Seared Corn on the Cob!(See directions above in intro.)
These two dishes are delicious! Both stars of the meal!

Enjoy!
Ciao!
Bun-less Meatball Sliders With A Parmesan Crisp!

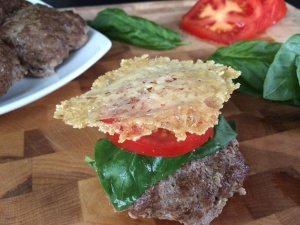
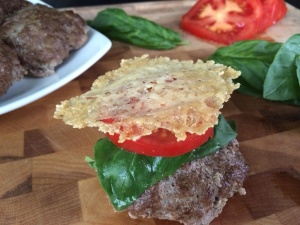
Perfect as an appetizer or dinner, these bun-less meatball sliders bring together the flavors of meatballs in sauce topped with fresh grated parmesan cheese without the tradition. Ripe tomatoes, fresh basil, and a parmesan crisp create a clean and colorful stack of deliciousness.

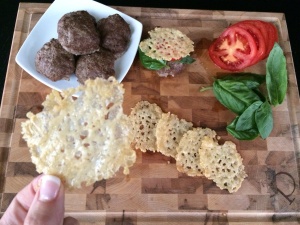
Seriously, who needs the bun? And, seriously, who can live in this world without parmesan crisps? Parmesan crisps take 5 minutes to make and, like a great pair of earrings, they dress up everything!

image

image

Bun-less Meatball Sliders
Makes 6-8- 3 inch sliders

Ingredients:

1 lb. lean ground beef
1 egg
2 tbsp. basil, chopped
1/4 cup parmesan cheese
4 cloves garlic,finely chopped
1/4 cup breadcrumbs

Directions:

Add all ingredients and mix well by hand.

Form into 3 inch balls and flatten slightly so that the top plateaus.

Place on a foil covered pan 2 inches apart.

Bake 350 degrees for 8-12 minutes until desired doneness, flipping half way.

Toppings:
Whole Basil Leaves
Ripe Tomatoes, sliced

Parmesan Crisps-
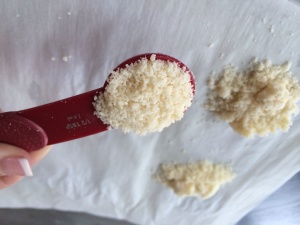
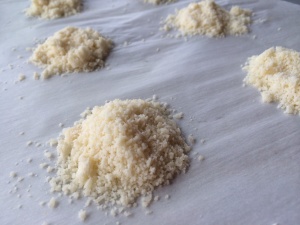
Spoon 1-2 tbsp. parmesan cheese in piles approx. 2 inches apart on a parchment paper lined pan.

image

image

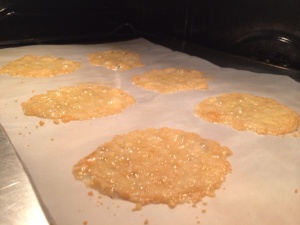
Bake 4-5 mins. until golden- just starting to brown.

image

Let cool.

image

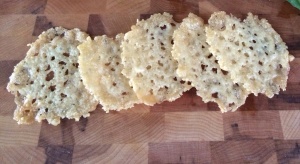
Peel crisp from paper.

Build bun-less meatball sliders by topping the meat patty with one slice of tomato, a few basil leaves, and a parmesan crisp on top!

image

Serve and Enjoy!!

Ciao!

Vegetarian Mexican Manicotti!

Most nights, dinner at our house is an unplanned fridge raid pantry raid mashup. Sometimes I’m missing an ingredient that I want to use and dinner morphs into something a little different. So the day I didn’t have tortillas, but I did have manicotti shells? Yep, Mexican Manicotti… and it is totally delish!

image

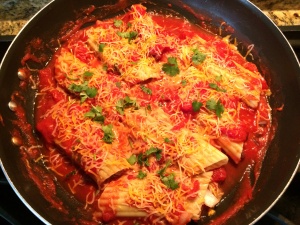
By making a sweet but spicy pineapple jalapeño salsa base, the stuffed manicotti shells can actually be cooked right in a large saucepan. No need to turn on the oven, this light, vegetarian, perfect-for-summer meal is sure to be a family favorite! The dish even looks beautiful. The colors create an amazing presentation!

image

Shhhhhhhh! Packed with powerful vitamins and protein, Mexican Manicotti is super healthy, too!!

Vegetarian Mexican Manicotti
(makes 12)

Ingredients:
1 8oz.box (12) of your favorite manicotti shells- boiled until al dente
1 can San Marzano tomatoes
2 cloves garlic, finely chopped
1/4 cup crushed pineapple
1 medium jalapeño pepper , chopped
1/2 cup black beans- soaked and boiled or canned beans, drained
1-1/2 cup shredded cheese- monterey jack and cheddar blend (1/2 filling 1/2 topping)
2 tomatoes, chopped
1 small onion, chopped
2 tbsp. chopped cilantro (1/2 filling 1/2 topping)
1 tsp. chili powder
1/2 tsp. cumin
1 tbsp. chopped green onions
salt/pepper to taste

Directions:

Drain manicotti and let dry on a cookie sheet drizzled with olive oil to keep them from sticking.

image

In a large saucepan, combine canned tomatoes, garlic, crushed pineapple, and chopped jalapeños.

Simmer.

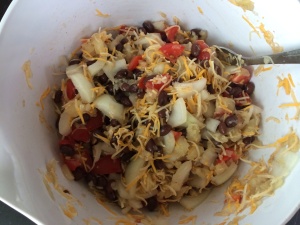
In a mixing bowl, combine black beans, shredded cheese, tomatoes, onion, cilantro, chili powder and cumin. Gently stir to mix well.

image

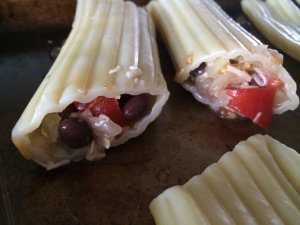
Carefully fill manicotti shells with black bean mixture.

image

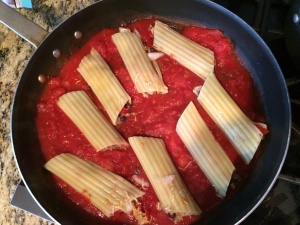
Place filled manicotti shells in sauce pan – 1 inch apart.

image

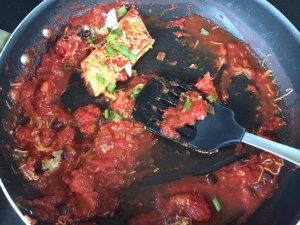
Cover with pineapple salsa from bottom of pan.

Cook 8-10 mins. until bubbly.

Cover with cheese and cook an additional 5 mins. until melted.

image

Sprinkle with green onions, cilantro and serve!

This recipe is soooooo great you probably won’t have leftovers…We never do!!

image

Enjoy!
Ciao!

New Adventure: Between The Eats!

So we totally have something to celebrate…drumroll, please… I am co-hosting a new cooking show called Between The Eats!! My quiet, recipe sharing, Pittsburgh food website “hobby” has turned into a crazy fun roller coaster and I never want it to stop!

image

I am co-hosting Between The Eats with the very talented Chef David Carmine, Executive Chef at Andora Restaurant in Sewickley. After his award-winning journalism career, Chef David decided to switch gears and enter the growing Pittsburgh food scene. With a flair for the unique, his foodie website foodnique.com was born. Great name, right??

IMG_0178

After our paths crossed over Pittsburgh foodie social media, David decided I would be a great co-host. Laughable…I know. He was serious. So in true princess fashion I held my head high, studied my lines, impressed when possible, and tried to maintain a cool, calm , and collective nature. BECAUSE ON THE INSIDE I WAS A CRAZY PERSON!! Thus, a star was born. Lol!

Trailer

About the show…
Between The Eats was created to fill a void in food video content. Creator of Pittsburgh’s food channel www.sgoeet.com and Between The Eats Producer, Bob Steranko saw a need to push more video across Pittsburgh’s growing food scene. His company Reel Mill currently produces online video marketing in Pittsburgh.

Putting a fun, creative twist on everyday recipes, Between The Eats showcases new recipe trends and everything “in between.” Light, fast-paced, and entertaining, the shows co-hosted charm shines through with the the pro chef/home chef dynamic. We are ecstatic about our new partnership with Whole Foods Markets!

IMG_0168

The show is available right now on Between The Eats You Tube channel or visit the website for more info and to get the recipes!
Click the Link below to WATCH EPISODE 1: Rethinking Mexican ! Don’t forget to Subscribe!

Episode 1: Rethinking Mexican

Celebrate with us Friday June 26th 12pm in Downtown Pittsburgh’s Market Square!! Live Launch Open to the Public! Hope to see you there!

Ciao!
Follow Between The Eats on Social Media!
Facebook
Twitter
YouTube
Instagram- BetweenTheEatsTV

Party Time With Athens Mini Fillo Shells!!

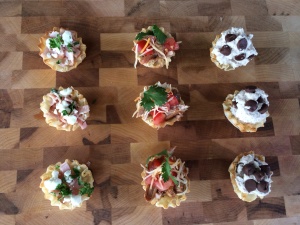
A fillo shell is a simple, flaky, bite- sized vessel that is neither savory nor sweet. Fully baked with a perfect crunch, the fillo shells can be absolutely priceless in comparison to working with thin sheets of fillo dough. The tedious process also includes adding butter to the dough sheets- definitely unwanted calories! Mini fillo shells are an easy button time saver without losing quality, crispness or taste!

image

My favorite ready made shells are Athens mini fillo shells! With just two or three ingredients, you can make the most amazing party appetizers or desserts! As Athens puts it, “Just fill ’em!” The first time I ever used Athens mini fillo shells I filled them with goat cheese and caramelized onions and popped them in the toaster oven for 10 minutes! Everybody loved them!

Here are a few of my easy and delicious mini fillo shell recipes!

image

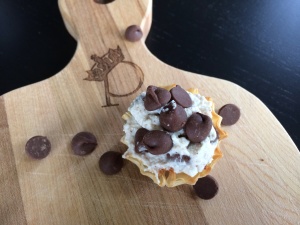
Chocolate Chip Cannoli

Ingredients:
1 package Athens mini fillo shells, contains 15 shells
1/2 cup ricotta
1/4 cup mascarpone cheese
1 tsp. vanilla
1 tbsp. cinnamon
1 tbsp. sugar
1/4 cup mini or full size chocolate chips (1/2 for filling and 1/2 for topping)

Directions:
Whip all ingredients, except chocolate chips until light and fluffy.
Fold in 1/2 chocolate chips.
Fill shells and top with extra chocolate chips
Enjoy!

image

Ham and Goat Cheese

Ingredients:
1 package Athens mini fillo shells, contains 15 shells
Crumbled goat cheese
Your favorite cooked ham, diced
Chopped parsely for garnish

Directions:
Carefully fill shells with ham and goat cheese.
Bake or broil in toaster oven for 7-10 mins. until cheese melts.
Top with chopped parsley.
Enjoy!

image

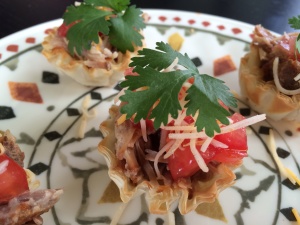
Pulled Pork Taco

Ingredients:
1 package Athens mini fillo shells, contains 15 shells
1/3 cup pulled pork (Slow cook pork shoulder roast all day seasoned with chili powder, cumin, cinnamon, or your favorite taco seasoning. Definitely can be made the day before and refrigerated.)
1 small tomato, chopped
1 tbsp. Mexican cheese blend
cilantro for garnish
sour cream, optional

Directions:
To serve warm, carefully fill shells with all ingredients, except sour cream or cilantro.
Bake or broil in toaster oven 7-10 mins. until cheese is melted.
Top with sour cream and cilantro.
Enjoy!

To serve cold, fill shells with all ingredients.
Enjoy!

image

image
All opinions expressed belong to Parmesan Princess! I seriously love Athens mini fillo shells and would love to share more easy and delicious small bite recipes with you soon!

Ciao!

image

Connect with Athens Foods on Facebook for even more mini fillo recipes!

Cherry Goat Cheese Pastry!

Sometimes the most simple recipes are the best! Do you glance at a recipe and move on when you see a super long list of weird ingredients not to mention weird kitchen instruments you have never heard of? If I’m trying to find recipe inspiration, I tend to skim to something more basic, a recipe where I can taste the list of ingredients. (And totally tell what ingredients I would swap and change!)

As an appetizer, brunch pastry, or dessert, these cherry goat cheese pastries are simply perfect! I hope you enjoy them as much as we do!

image

Cherry Goat Cheese Pastry
Makes 6 servings

Ingredients:

2 sheets frozen puff pastry -1 roll fillo dough- fillo shells already cooked
10 oz. crumbled goat cheese
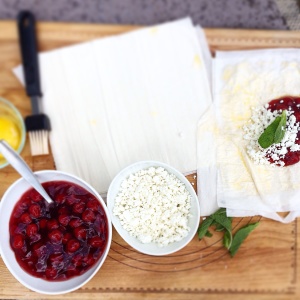
1 lb. fresh cherries, pitted and quartered mixed with 2 tbsp. sugar and 1 tsp. lemon juice OR 1 21oz. can cherry pie filling
1 large egg yolk
2 tsp. heavy cream
Granulated sugar for sprinkling

Directions:

Preheat oven to 400 degrees.

Pit and quarter your fresh cherries and mix with sugar and lemon juice Set aside until juice thickens.

image

Flour work surface and lightly roll out puff pastry to be 1/2″ longer on all sides.

Cut dough into an even number of squares or circles.

Divide the cherry filling and goat cheese evenly and place on half of the shapes.

Cover with another shape. press sides and pinch to close.

Beat egg and heavy cream together and brush to seal and coat top of pastry.

image

(If using Fillo dough, keep dough damp so it doesn’t dry up. Fill, cut into rectangles and fold like a present. Brush with egg mixture to keep closed. )

SUPER EASY BUTTON!! (If using Fillo shells, just fill with cherry and goat cheese filling and bake to melt until golden and bubbly.)

Slice 2 slits on the top and sprinkle with sugar.

Place on a baking sheet lined with parchment paper.

Bake for 20-25 mins. until golden brown and puffy.

Don’t burn your mouth! Let cool for 5-10 minutes before serving.

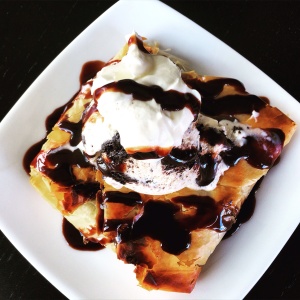
For dessert, I topped my pastry with ice cream, whipped cream, and chocolate syrup!

image

image

Enjoy!
Ciao!

Chorizo Manchego Tomato Burgers!

Sausage with a Latin flare makes an amazing burger! Chorizo is currently at the top of the food trend-o-meter, making appearances everywhere from food truck favorites to high end brunches! A seasoned pork sausage, the ancho chile powder gives chorizo its red color and spicy kick.

image

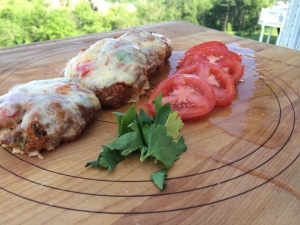
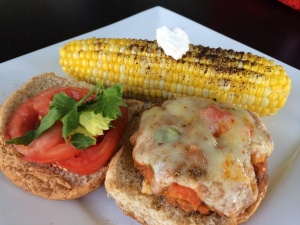
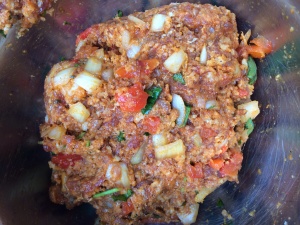
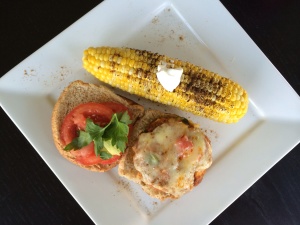
One of my family’s favorite chorizo meals is a chorizo burger. Add in your favorite Southwest /Latin toppings right into the meat mixture and more on the bun! Today I made a chorizo burger with melted manchego cheese topped with thick juicy heirloom tomatoes! The tomato cools down the heat of the burger. I did not have avocado today, but a mock guac would be killer on this burger, too! Yum!

image

Here is the recipe!

Chorizo Manchego Tomato Burgers
(Makes 4 1/4 lb. burgers- 6 medium-sized burgers)

Ingredients:
1 lb. ground chorizo
1 egg
1/2 cup Panko breadcrumbs
2 cloves garlic, pressed
1 small onion, chopped
1 roasted red pepper, chopped
2 tbsp. cilantro, chopped
1/2 tbsp. chili powder
1/2 tbsp. cumin
salt/pepper to taste

Your favorite buns!

Topping:
sliced Manchego cheese
sliced heirloom tomato
handful or cilantro, parsely, or lettuce

Directions:

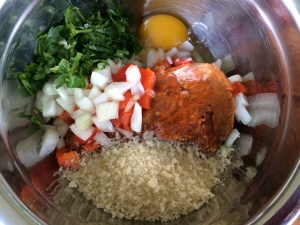
In a mixing bowl, mix by hand all ingredients until well blended.

image

image

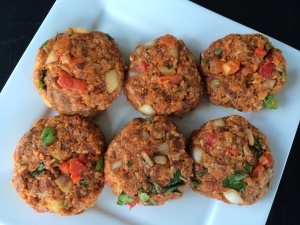
Mold into 4-6 burger patties depending on intended size.

image

Grill (8-10 mins turning once) or bake in 375 degree oven (10-12 mins) until set and meat is cooked through.

Add manchego cheese slice and let it melt.

Remove from heat and let juices settle.

Place on bun, top with tomatoes, cilantro, and our favorite toppings!

image

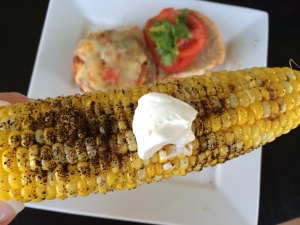
Oh, and this corn!

image
Stay tuned! Many summer corn recipes coming soon!!

Enjoy!
Ciao!
Greek Quinoa Salad!

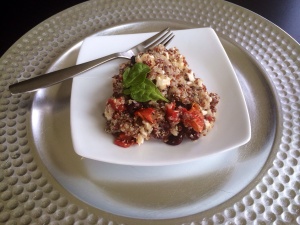
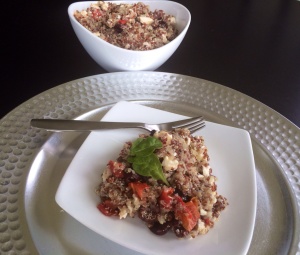
Ready for the long weekend? Memorial Day picnics require the perfect picnic sides. Cold side salads are always a hit. One of my favorites is a Greek quinoa salad! A healthy, quick and easy salad bursting with the traditional and refreshing Greek flavors we love.

image

Tomatoes, cucumbers, red onion, feta cheese, and a whole lotta squeezed lemon!

This heathy Greek quinoa salad can be served alone or alongside grilled favorites! No guilt and totally healthy, superfood quinoa is a protein powerhouse. Give this salad a try!

image

Greek Quinoa Salad

Ingredients:
1-1/2 cups quinoa
3 cups water
3/4 cup tomatoes, chopped
3/4 cup cucumber, chopped
1 small/medium red onion, chopped
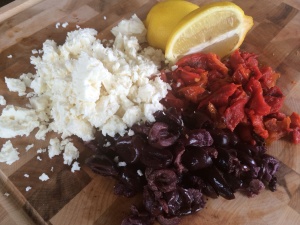
1/2 cup pitted kalamata olives, chopped
1/2 cup crumbled feta cheese
4 lemons, squeezed
Salt/Pepper
Oregano
Fresh parsley, chopped

Directions:
Rinse quinoa in a strainer to remove any sediment.

In a medium saucepan, add water and quinoa.

Being to a boil and summer for 12-18 minutes or until quinoa is soft but still firm to the bite.

Drain quinoa well and cool.

Once the quinoa is cool, add all other ingredients to a large mixing bowl.

Squeeze lemon juice and add oregano, salt and pepper to taste. Garnish with fresh parsley and/or chop some and throw it in.

image

Enjoy!
Ciao!
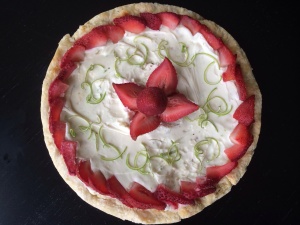
Strawberry Lime Mascarpone Tart!

A fruity, refreshing tart is totally Spring- totally Summer! Do you ever switch it up? Instead of the usual strawberry blueberry sweet tart, how about a sweet and tangy strawberry lime tart?

Today’s recipe is just that- A step outside the usual, a hint of lime and creamy whipped mascarpone cheese. I don’t think a fruit dessert can get any better. At heart, I’m really a chocolate girl! Shhhhh!

Enjoy this recipe!

image

Strawberry Lime Tart
(Makes one 8 inch tart)
Ingredients:

Tart Crust:
1 cup flour
1/2 cup powdered sugar
1 cold stick butter cut into squares

Filling:
1-8oz. Mascarpone cheese
1/2 cup powdered sugar
1 tsp. vanilla
1 tsp. lime juice

Topping:
Strawberries – Lime Zest

Directions:

Heat oven to 325 degrees.

Grease a tart pan or a 1/2″ inch thick 8″ round cake pan.

Whisk together flour and powdered sugar.

Add in chunks of butter and work with your fingers until it starts to stick together and forms a dough.

Wrap in plastic wrap and chill for 30 mins. in refrigerator.

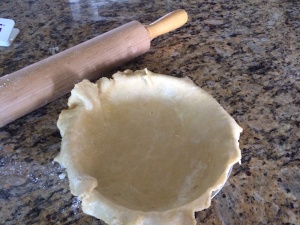
Roll out into an 8 inch circle.

Press into pan. If using cake pan leave a small overhang to be folded over.

image

Bake crust 10-12 mins or until golden.

Let cool.

In a mixing bowl, whisk together mascarpone cheese, powdered sugar, and 1 tsp. lime juice.

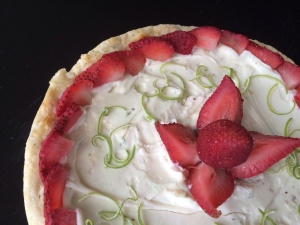
Add filling and top with sliced strawberries and lime zest!
Get creative! Make a beautiful design or mass chaos. Either way, it tastes the same!

image

image

Enjoy!
Ciao!
Easy Cinco de Mayo Cheese Ball!
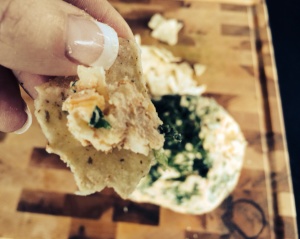
Think of an inside-out jalapeño popper. That’s pretty much the taste of this delicious and super easy cheese ball! Cinco de Mayo perfection, but it’s also the perfect summer party appetizer! Save and file this one for a summer fiesta! Pairs really well with tequila ; )

image

Cinco de Mayo Cheese Ball
(Makes one cheese ball feeds 8-10 as an appetizer)

Ingredients:

1 -8 oz. package of Cream Cheese, softened
1- 2 cup package shredded Mexican cheese
2 – jalapeño peppers, chopped (may substitute bell peppers or mild hot peppers to reach desired heat level)
1 large tomato, chopped
1 small onions, chopped
2 tbsp. chili powder
1 tbsp. cayenne pepper
1/2 tsp. cumin
salt and pepper to taste
2 cloves garlic, finely chopped
1/3 cup finely chopped cilantro

Directions:

Soften the package of cream cheese either by setting on the counter at room temperature for 30 mins or by placing cream cheese in a bowl of hot water for 10 mins.

Remove cream cheese from package and place in a mixing bowl.

image

Add shredded cheese and mix well.

Gently stir in peppers, tomatoes, onions, chili powder, cayenne pepper, cumin, salt and pepper.

Mold cheese mixture into a ball. It will be a little mushy.

image

Mix garlic and cilantro together and place on a flat plate.

Roll the cheese ball in the chopped garlic cilantro mixture to coat.

image

Wrap cheese ball in plastic wrap and refrigerate for two hours.

image

Enjoy!
Ciao!