Tag: food blogger pittsburgh

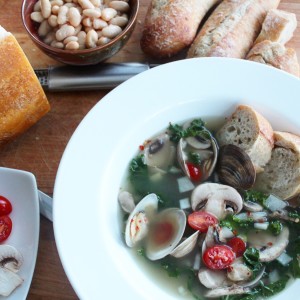
Zuppa di Vongole! Clams in Broth!

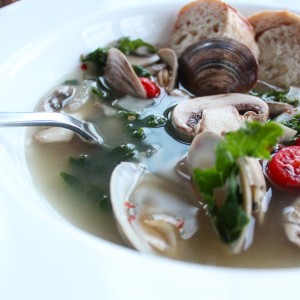
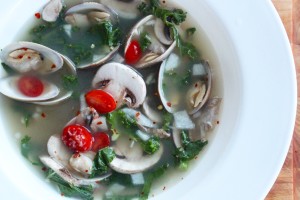
Soup, kind of. This dish is more like clams in broth with some veg. The best part is sopping up the broth with some crusty bread! Clams are my comfort food, linguini clams for Sunday Supper, or just a simple broth warms my belly on a cold winter evening. For some reason the leftovers are even better the next day for lunch!
img_5573

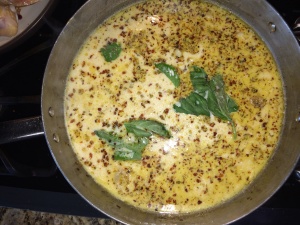
The base is chicken stock with flavors of garlic, onion, and white wine. The red pepper flakes add the spice!

Enjoy one my favorite recipes ever…
img_5585

Zuppa di Vongole (Clams in Broth)

Ingredients:
2 tbsp. olive oil
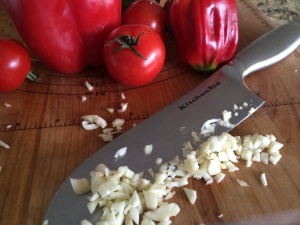
3 cloves of garlic, finely chopped
1 small onion, finely chopped
1 12 oz. package clam meat
1 cup white wine, I used chardonnay
10 cups chicken stock, homemade or store bought
1 cup Sliced button Mushrooms
2 dozen bottle next clams
1 cup cannellini beans
1/2 cup sliced grape, cherry tomatoes, sliced
1 cup kale
red pepper flakes to taste
salt/pepper to taste
Fresh grated Parmigiano Reggiano
Crusty bread

Directions:
Heat olive oil in a soup pot.
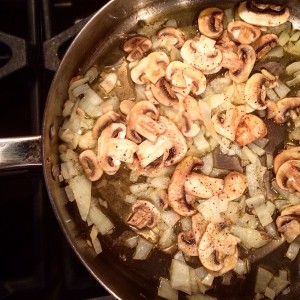
Add garlic, onion, white wine, and clam meat, salt and pepper, and cook until onions are softened.
Add stock, mushrooms, beans, and clams.
Cook until clams open and all are heated through.
Remove from heat and add kale, sliced tomatoes, red pepper flakes, salt and pepper.
Top with fresh grated Parmigiano Reggiano and serve with crusty bread.

Enjoy!
Ciao!
img_5582
Parmesan Princess is the proud US Ambassador for Parmigiano Reggiano in Parma, Italy. The real parmesan cheese, make sure its Parmigiano Reggiano.
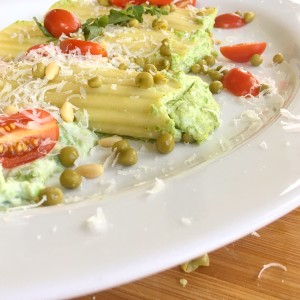
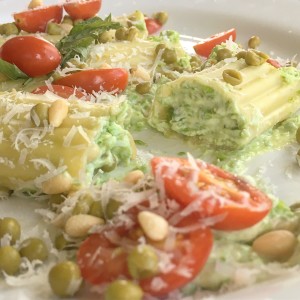
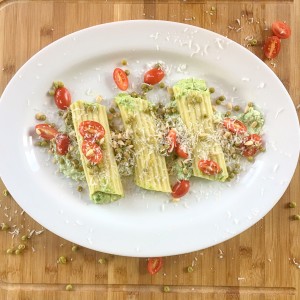
Sweet Pea Manicotti!

Sweet peas are so underrated. Always associated with baby food, I feel like they are the last ingredient we think of to make something serious. For example, my kids will have peas with something else, I will grab them as a garnish, but they are hardly ever the main act.

image

image

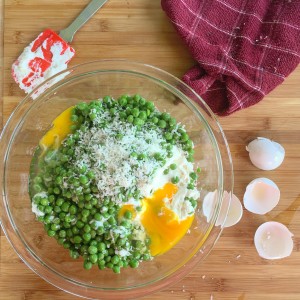
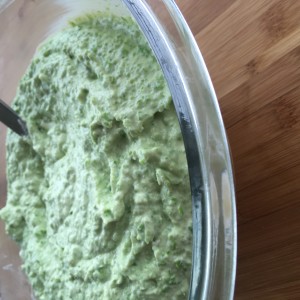
So there is always that experimental Meatless Monday where various vegetables get new jobs. This particular Monday, I was looking for a manicotti veg and there was the bag of frozen peas. I blended the peas with ricotta, egg, and fresh grated parm for the filling. Just then Bella walked into the kitchen, “Is that mint ice cream?” she asked. Well, it looked like it!

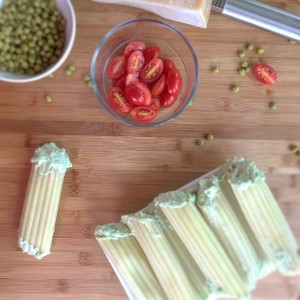
I was thinking they are never going to eat this but I’m knee deep, so this is what we are having for dinner. The neighbor kids came over, who always love to help me cook, so I boiled the manicotti shells and the kids had a filling party. It was so great! We discussed the careful art of spooning the filling without tearing the shell, and filling each side so that the middle gets some, too.
image

image

image

We blended some extra peas, ricotta, and parmesan cheese for the topping. All the kids loved it! Was it the sweetness from the peas? The fact that they were involved in creating the final product? Who knows? But I was thrilled! Make these for dinner because they are delicious, but more importantly so the kids can help and hopefully eat!
image

Sweet Pea Ricotta Manicotti

Ingredients:
2 cups fresh whole milk ricotta
1/2 cup fresh grated parmesan cheese
1 egg
1 16 oz. frozen sweet peas – saving 1 cup
salt/pepper
8 dry manicotti shells

For Topping:
2 cups peas
2 tbsp. ricotta
1/4 cup fresh grated parmesan cheese
1 cup sliced cherry or grape tomatoes
2 tbsp. pine nuts
parmesan to grate on top

Directions:
Preheat oven 325 degrees.
Blend Ricotta, peas, parmesan cheese, and 1 egg.
Salt/pepper and set aside.
Boil manicotti shells 5-8 minutes until just under cooked.
Fill manicotti shells with ricotta pea filling with a small spoon or piping bag.
Spray 9X13 glass pan with non-stick spray.
Spoon left over filling in bottom of pan and spread with a spatula.
Line pan with one layer of manicotti.
Cover with foil and bake 20-30 minutes until filling is hot and starts to bubble.
Meanwhile, make topping. Blend peas, ricotta, and parmesan cheese.
Remove manicotti from oven and allow to set 10 minutes.
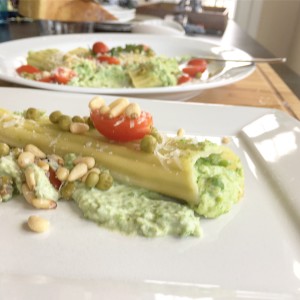
Plate the manicotti by placing them on a smear of topping underneath, one scoop on top, sprinkle with sliced tomatoes and pine nuts and finish with fresh grated parmesan cheese.

image

Enjoy!
Ciao!

Southwest Chicken Thighs!

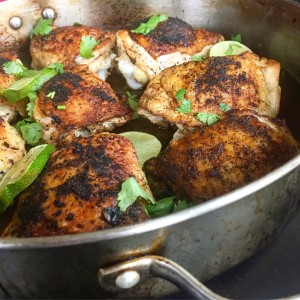
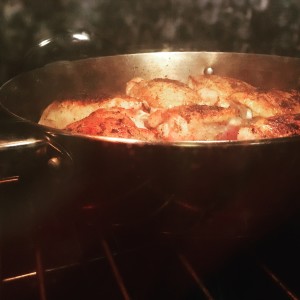
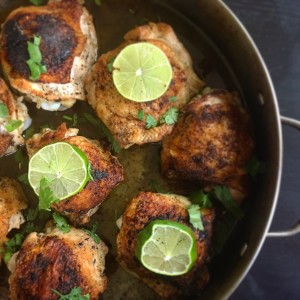
Chicken thighs are the best! When cooked with the right technique, they get crispy skin and juicy, flavorful meat. My favorite cooking method is to brown skin-on thighs with a simple olive oil and seasoning rub, and throw them in the oven for the perfect finish.

image

It took me a bit to master the art of browning the skin because I am too impatient. Did you ever go to flip and the skin detaches from the meat and sticks to the pan?
Uuugh!
The solution to this problem is making sure the pan is at a high heat and waiting to flip until the skin is crisp. If you can be patient, your chicken thighs will be perfect!

image

image

Here is the recipe…

Southwest Chicken Thighs
Ingredients:
4-6 skin on chicken thighs
3 tbsp. Olive oil
1 tbsp. Garlic salt
1 tbsp. Chili powder
1 tsp. Cumin
1 tsp. Red pepper flakes
2 limes

Directions:

Preheat oven 350 degrees.

Rub chicken thighs with olive oil using fingers or brush.

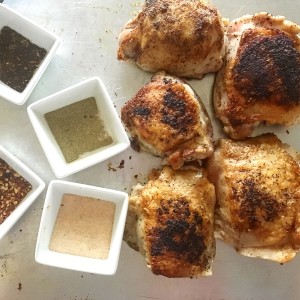
Sprinkle with garlic salt, cumin, chili powder, and red pepper flakes.

image

Heat your olive oil swirled pan to high heat.

Place chicken thighs skin side down and cook until seared and browned approx. 7-9 minutes.

Flip and brown other side of chicken.

Place pan in oven 12-20 minutes until chicken is cooked through.

image

Remove from oven.

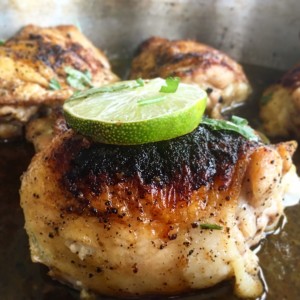
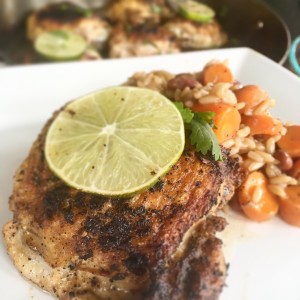
Place sliced lime on each thigh.

Serve with your favorite sauce and sides.

image

image

Enjoy!
Ciao!

Kafta Kabobs!

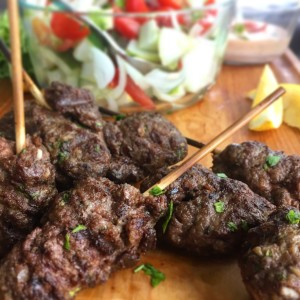
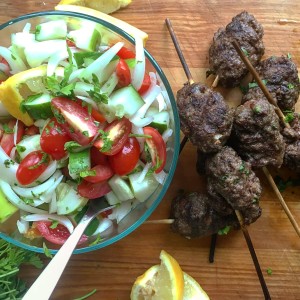
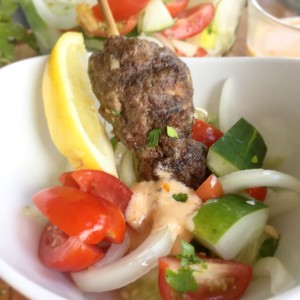
Kafta, Kofta, Kefta…every translation spells it differently! Let’s call it meat on a stick. Ok, really flavorful meat on a stick.

image

With Lebanese exotic flavors of cumin, cinnamon, and of course the garlic, Kafta has a deep layering and tastes like a full meal. Often served cold for lunch, or hot for lunch or dinner, it is a fun opportunity to try something different that is really quick and easy to make.

My kids are fans because it is on a stick I think. They first started eating “things kids aren’t supposed to like” when skewered. Try it, seriously!

image

A few tips, I used an egg. (Gasp!) Kafta is traditionally stuck together by using soaked white bread that’s rung out and put in the food processor. Yeah, So are traditional meatballs, but sometimes you don’t want to clean the thing, right? Feel free!

Soak the sticks! I forgot and a few of mine burned!!

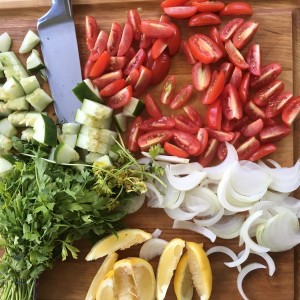
The cucumber salad is amazing and accompanied meat dishes quite often on my table in the summertime.

image

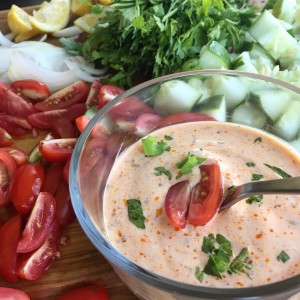
And guys, the sauce…simple and delicious! It’s more powerful than a smoothe tahini with the punch of Romesco. I used a delicious jarred Romesco, but you can get crazy and make your own!

image

Here are the recipes…

Kafta Kabobs

Ingredients:
1 lb. ground beef
3 garlic cloves, finely chopped
1 small onion, finely chopped
1/4 cup parsley, finely chopped
1 egg
1 tsp. Allspice
1 tsp. Cumin
1/2 tsp. Paprika
1/2 tsp. Cinnamon
Salt/pepper to taste
Skewers

Directions:
Soak skewers in water for at least one hour until ready to mold the

Heat grill to 300 degrees.

With hands, mix beef, garlic, onion, egg, and all of the spices, salt and pepper.

image

image

Mold 1/6 of the mixture onto one end of each skewer trying to keep mold to 1 inch thickness.

Grill approximately 4 minutes each side until cooked to desired fineness.

image
Cucumber Salad

Ingredients:
1 cucumber chopped
1 pint grape tomatoes, halved
1 small red onion or Vidalia onion, sliced
Handful parsley, chopped
1 lemon , squeezed
3 tbsp. Garlic oil
Salt/pepper to taste

Directions:
In a large moxing bowl, toss to coat.

Greek Yogurt Romesco Sauce
1/4 cup plain Greek Yogurt mix with
1/4 cup Romesco
Chopped Parsley flakes and sliced tomato garnish

image

image

Enjoy!
Ciao!

Roasted Corn and Black Beans!

Happy Cinco de Mayo! For some of us, Mexican night is a weekly occurrence, taco Tuesday for example, but for others it is rare.
image

In my house, Mexican is an important weekday supper staple. An easy dinner filled with fresh vegetables, and the kids ask for seconds? Everybody wins!
image

I change up my menu based on taco type- beef, chicken, pork- or I add some different side dishes. The dishes include some combination of beans and rice, roasted corn, and homemade chunky salsas. Roasting the corn creates a depth of flavor. I especially love corn on the cob done this way- roasted and seasoned with butter, chili powder, cayenne pepper, topped with sour cream and sprinkled with garlic and cilantro. It is absolutely delicious!

image

Here is the recipe for my roasted corn and black beans dish…

image

Roasted Corn and Black Beans
Ingredients:
2 cups corn, sliced off the cob or frozen.
2 tbsp. Olive oil
3 cloves of garlic, finely chopped
1/2 small onion, finely chopped
1 cup black beans, cleaned and soaked
1 tsp. Chili powder
1/2 tsp. Cumin
1/2 tsp. Cayenne pepper
1 tbsp. Chopped cilantro
Salt/pepper to taste

Ingredients:
Heat olive oil in a medium pan.
Add corn, garlic and onions.
Cook until corn is browned and garlic and onions are softened.
Add beans, salt/pepper, chili powder, cumin, and cayenne pepper. Mix well.
Remove from heat and toss with cilantro.
Serve warm or cold.

image

Enjoy!
Ciao!

Chicken Romano and Lemon Garlic Brussels Sprouts!

We are waiting for Spring here in Pittsburgh, PA. Two weeks ago my kids got light sunburn on their faces because it was 75 degrees and sunny, two days ago we had ice and snow and wind and…I seriously just got chilled writing this! Ha!

Mother Nature’s lack of consistency is disturbing. I guess will accept the gloomy, rainy April days only because in May we get to smell the flowers!

Until Spring decides to show up, smell the garlic! Cook, experiment in the kitchen, keep yourself busy! Not only is garlic full of amazing health benefits like lowering cholesterol and lowering the risk of heart disease, it also adds robust flavor to everyday cooking.

Lately, I have been double-garlicking, which is utilizing garlic olive oil along with fresh chopped garlic. When used in combination, the flavors transform a healthy chicken breast or vegetable dish to ah-mazing! Here are the recipeS…Yep, two today!!

image

image

Chicken Romano
Ingredients:
1.5 lbs. boneless, skinless chicken breasts (If chicken breasts are super thick, slice in half for faster cooking)
1/4 cup garlic olive oil
1-2 cloves garlic, finely chopped
1 tbsp.basil, finely chopped
salt/pepper
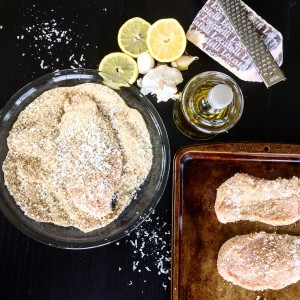
2 cups breadcrumbs
1/2 cup fresh grated Locatelli Pecorino Romano cheese
1/2 cup fresh grated Parmesan Reggiano cheese

image

image

Directions:
Preheat oven to 350 degrees
In a mixing bowl, combine olive oil, garlic, basil, salt/pepper.
Transfer mixture to a Ziploc bag.
Marinate chicken for 1 hour -24 hours in refrigerator.
Fill a pie plate with breadcrumbs and cheeses.
Coat each chicken breast, shake excess off, and place on a greased or parchment papered pan.
Bake 25-35 mins. or until internal temperature reaches 165 degrees and coating is golden brown.

image

Lemon Garlic Brussels Sprouts
Ingredients:
1 lb. brussels sprouts, cleaned and halved
3 tbsp. garlic olive oil
3 tbsp. lemon juice
1 lemon
salt/pepper
fresh grated parmesan reggiano

image
Directions:
Preheat oven 425 degrees.
Place brussels sprouts in a pan.
Coat with oil,lemon juice, and salt/pepper.
Slice the lemon and place a few pieces on top of sprouts.
Roast until edges of sprouts are crispy. Approx. 6-9 minutes.

image

image

image

Enjoy!
Ciao!

Steak Stroganoff

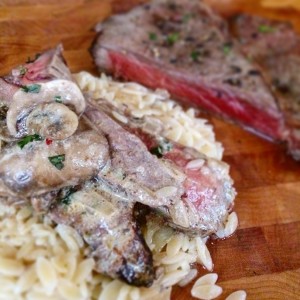
Beef stroganoff is a mix of sautéed onions mushrooms and tender beef finished with sour cream. Usually served over buttered noodles, traditional Russian stroganoff is served over mashed potatoes or rice. Definitely a true comfort food, the stew-like dish warms the belly… and the heart.

image

image

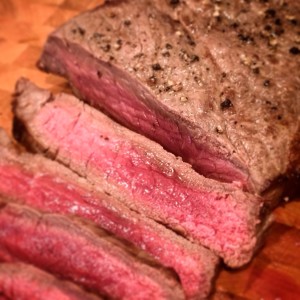
The trick to stroganoff is creating tender bites of meat. This recipe uses the “london broil” method instead of a braised beef top round, which I find to be too tough.

image

image

Other options are beef tenderloin or a sirloin steak cut into 2 inch strips. I finish the meat in red wine to tenderize and add flavor. Red wine softens the meat’s muscle fibers creating a juicy, tender bite.

Here is the recipe…

Steak Stroganoff
Ingredients:

2 tbsp. Butter
2 tbsp. Olive oil
1 large onion, sliced thin
2 8oz. Packages of button mushrooms, sliced (or any of your favorite mushrooms)
2 lbs. “London broil” labeled beef or Beef tenderloin filet
1/2 cup red wine
1/2 cup beef stock
3/4-1 cup sour cream, add until desired richness
Salt/pepper

Directions:
Preheat oven on high broil.
Heat butter in a pan.
Add sliced onions and cook until soft.
Add mushrooms, drizzle olive oil, salt and pepper to taste.
Mix all together and sauté 3-5 minutes. Remove from pan and set aside.
Salt and pepper steak and broil 4-5 minutes per side until slightly under medium rare in the center.
Let stand for 10 minutes and slice against the grain.
Meanwhile, boil water and cook orzo according to package.
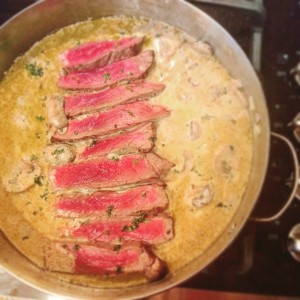
Add wine and stock to pan to heat placing meat in the middle to absorb flavors, tenderize, and finish off to desired doneness.
Add mushrooms and onions and mix well.
Remove from heat and add sour cream and stir until creamy.
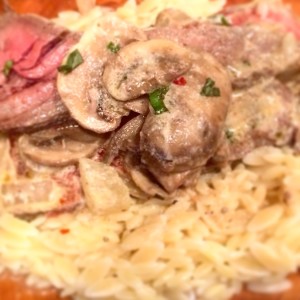
Serve stroganoff over orzo.

image

Enjoy!
Ciao!

Double Chocolate Cherry Chunk Cookies

My holiday baking typically includes tons of nuts! I am not sure if it’s because I grew up with old school Italian recipes where heaps of nuts and/or raisins were added to every single simple cookie or because I loooove the taste and texture. Not a huge raisin fan, I tend to add dried cranberries or cherries instead.
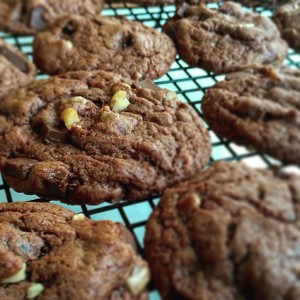
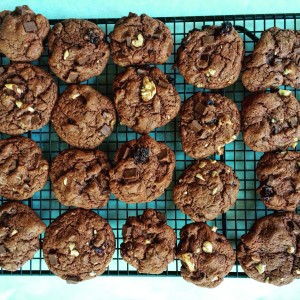
These double chocolate chunk cookies are a holiday favorite cookie- a must try! I doctored them up with some dried cherries and walnuts! Get creative and add in your faves!

image

image

Double Chocolate Cherry Chunk Cookies
(Makes 3 dozen 2 inch cookies)
Ingredients:
2 cups flour
1 tsp. baking soda
1/2 cup cocoa
1 cup butter, softened
1-1/2 tsp. vanilla extract
1 cup sugar
1 cup light brown sugar
2 eggs
1 11.5 oz package chocolate chunks
3/4 cup dried cherries, chopped (optional)
3/4 cup walnuts, chopped (optional)

Directions:
Preheat oven to 350 degrees.

In a large mixing bowl combine flour, baking soda, and cocoa.

Cream butter, sugar, brown sugar, and vanilla until light and fluffy.

Add eggs one at a time, beating well.

Beat in dry mixture a little at a time until well mixed.

Stir in chocolate chunks, chopped dried cherries, and chopped walnuts.

Drop by tsp. onto a parchment lined cookie sheet. 2 inches apart.

Bake 9-11 minutes until set.

Remove and let cool on sheet for 3 minutes then move to a wire rack to complete.

image

Enjoy!
Ciao!

Chicken with Red Pepper Cream Sauce!

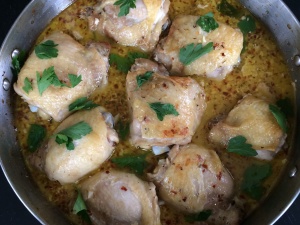
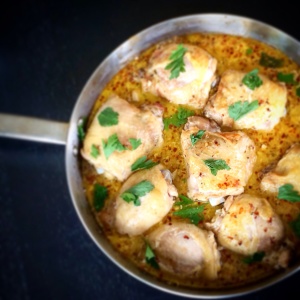
You will definitely be sopping up this sauce with some crusty bread! The red pepper cream sauce takes ordinary, boring chicken to a new level, but the real reason this dish is totally amazing is the cut of chicken. For a flavorful boost, use chicken thighs or legs instead of chicken breasts.  No need to worry about drying out, this chicken falls off the bone!!

image

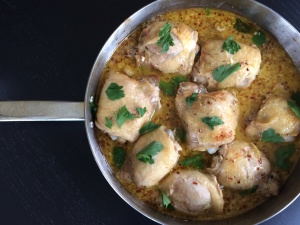
To ensure crispy skin, the chicken is browned first in a pan, then roasted in the oven.  You can always pop it under the broiler at the end for an even crispier finish! It looks beautiful topped with fresh basil at the end. Simply serve it out of the pan!

image

Chicken with Red Pepper Cream Sauce

image

Ingredients:
6-8 chicken thighs
3 tbsp. olive oil +2 tbsp. for sauce
3 cloves garlic, finely chopped
1 small onion, finely chopped
1 cup chicken stock
1/2 cup heavy cream
1/4 cup fresh grated Parmesan cheese
1- 1-1/2 tbsp. red pepper flakes to taste
1/2 tsp. thyme
1/2 tsp. oregano
1/2 tsp. basil
1/4 cup fresh basil leaves
salt/pepper to taste

image

Directions:

Preheat oven 400 degrees.

Season chicken thighs with salt and pepper.

Heat olive oil in a large pan to medium high heat.

Add chicken skin side down and brown both sides, approximately 3-5 mins. per side.
Remove chicken from the pan and set aside. (Chicken will be just browned, not cooked through.)

To additional 2 tbsp. olive oil, add onion, garlic and red pepper flakes.
Golden garlic and cook onion while continuously stirring approximately 2-3 minutes or until you smell the red pepper and garlic.

Stir in chicken stock, heavy cream, Parmesan, thyme, oregano, and basil.

Bring to a boil.
Reduce heat to simmer until thickened, approximately 5-7 minutes.

Add chicken back to skillet.(Sauce should only cover the bottom of the thighs.)
Roast in the oven until cooked through, 25-35 minutes.

image

Top with fresh basil and serve!
Ciao!

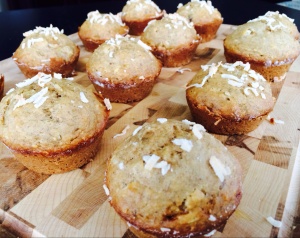
Banana And Coconut Skinny Muffins Scream Summer!!

Sometimes we need an easy to make, low fat, healthy muffin… that reminds us of vacation! Because summer is so close we can taste it, literally. One of my favorite baking opportunities occurs when super ripe bananas are staring at me. I can’t help but think about the delicious possibilities!!

image

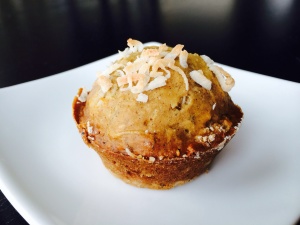
Usually a healthy muffin is hard as a rock, because of the wheat flour, and dry, because we take out all of the fat and sugars. These muffins are sweetened with honey and the natural sweetness of the super ripe bananas! A little brown sugar and cinnamon even out the sugar profile and add a pop of flavor! They taste totally tropical! Hmmm… maybe some rum next time 😉

image

Guilt Free and Fabulous! Here is the Recipe!

Banana Coconut Muffins
(Makes 12 muffins)

Ingredients:
2 cups flour- 1/2 whole wheat and 1/2 white or all white (If all whole wheat they will be hard)
1 tsp. baking soda
1/2 cup light brown sugar
1 tbsp. ground cinnamon
1/4 cup honey
1 tbsp. vanilla
2 super ripe bananas- smashed
1/4 cup almond milk or cow’s milk
1 large egg, beaten
1/2 cup shredded coconut + 2 tbsp. for sprinkling on top

Directions:

Preheat oven to 325 degrees.

Grease and flour your favorite muffin tin. Mine is USA Pans! They are fabulous!

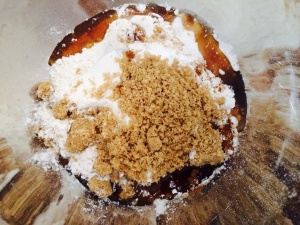
In a mixing bowl, sift flour, baking soda, light brown sugar, and cinnamon.

image

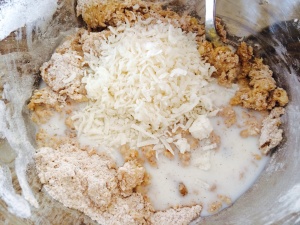
Add the honey, vanilla, mashed bananas, egg, and coconut.

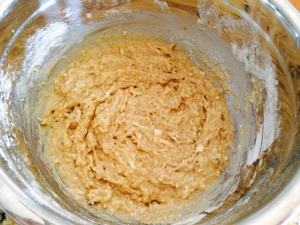
Slowly and gently fold in the ingredients, breaking and chunks apart.

Add the milk. It will thin out the batter, but it will still be a nice, thick consistency.

image

image

Fill muffin tins 3/4 full.

image

Bake 15-17 minutes. Rotate pan and sprinkle with coconut after 10 minutes.

image

Bake until the toothpick test shows a clean toothpick. Insert into center to test.

image

Enjoy!
Ciao!